 by
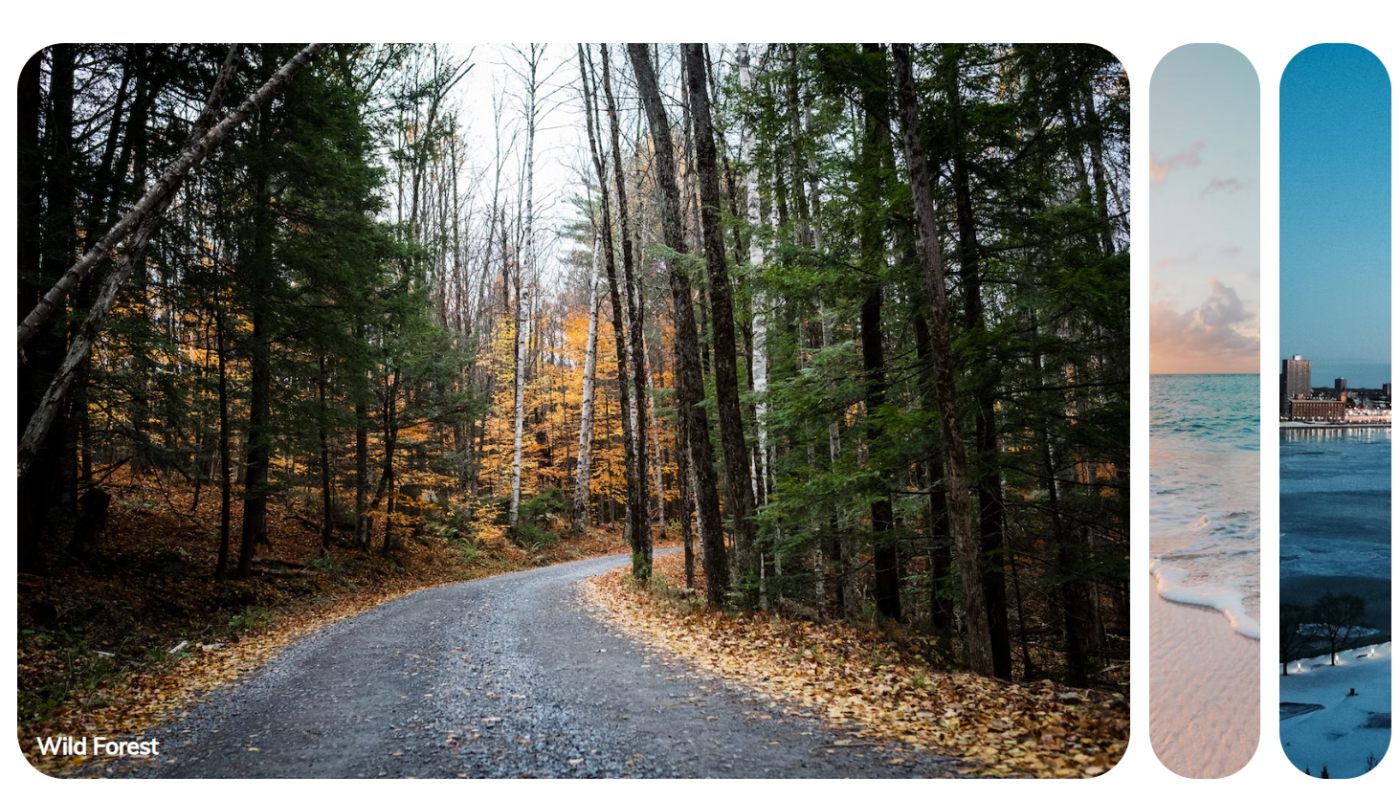
by Looking to learn how to create your own CSS image gallery carousel with Expanding Images? In this short tutorial guide, we’ll walk you through the process of building a sleek and aesthetic CSS image gallery carousel using CSS and JavaScript techniques. Whether you’re a beginner or an experienced developer, our tutorial is easy to follow and will help you create an expanding image gallery in no time.
HTML for the CSS Frontend
Here’s the HTML we’ll use to setup the images and cards which will expand the carousel
<!DOCTYPE html>
<html lang="en">
  <head>
    <meta charset="UTF-8" />
    <meta name="viewport" content="width=device-width, initial-scale=1.0" />
    <link rel="stylesheet" href="style.css" />
    <title>Expanding Cards</title>
  </head>
  <body>
    <div class="container">
      <div class="panel active" style="background-image: url('https://images.unsplash.com/photo-1558979158-65a1eaa08691?ixlib=rb-1.2.1&ixid=eyJhcHBfaWQiOjEyMDd9&auto=format&fit=crop&w=1350&q=80')">
        <h3>Explore The World</h3>
      </div>
      <div class="panel" style="background-image: url('https://images.unsplash.com/photo-1572276596237-5db2c3e16c5d?ixlib=rb-1.2.1&ixid=eyJhcHBfaWQiOjEyMDd9&auto=format&fit=crop&w=1350&q=80')">
        <h3>Wild Forest</h3>
      </div>
      <div class="panel" style="background-image: url('https://images.unsplash.com/photo-1507525428034-b723cf961d3e?ixlib=rb-1.2.1&ixid=eyJhcHBfaWQiOjEyMDd9&auto=format&fit=crop&w=1353&q=80')">
        <h3>Sunny Beach</h3>
      </div>
      <div class="panel" style="background-image: url('https://images.unsplash.com/photo-1551009175-8a68da93d5f9?ixlib=rb-1.2.1&ixid=eyJhcHBfaWQiOjEyMDd9&auto=format&fit=crop&w=1351&q=80')">
        <h3>City on Winter</h3>
      </div>
      <div class="panel" style="background-image: url('https://images.unsplash.com/photo-1549880338-65ddcdfd017b?ixlib=rb-1.2.1&ixid=eyJhcHBfaWQiOjEyMDd9&auto=format&fit=crop&w=1350&q=80')">
        <h3>Mountains - Clouds</h3>
      </div>

    </div>

    <script src="script.js"></script>
  </body>
</html>
The CSS File
Next up is the CSS which we’ll use to style the HTML, that we’ve created above.
@import url('https://fonts.googleapis.com/css?family=Muli&display=swap');

* {
  box-sizing: border-box;
}

body {
  font-family: 'Muli', sans-serif;
  display: flex;
  align-items: center;
  justify-content: center;
  height: 100vh;
  overflow: hidden;
  margin: 0;
}

.container {
  display: flex;
  width: 90vw;
}

.panel {
  background-size: cover;
  background-position: center;
  background-repeat: no-repeat;
  height: 80vh;
  border-radius: 50px;
  color: #fff;
  cursor: pointer;
  flex: 0.5;
  margin: 10px;
  position: relative;
  -webkit-transition: all 700ms ease-in;
}

.panel h3 {
  font-size: 24px;
  position: absolute;
  bottom: 20px;
  left: 20px;
  margin: 0;
  opacity: 0;
}

.panel.active {
  flex: 5;
}

.panel.active h3 {
  opacity: 1;
  transition: opacity 0.3s ease-in 0.4s;
}

@media (max-width: 480px) {
  .container {
    width: 100vw;
  }

  .panel:nth-of-type(4),
  .panel:nth-of-type(5) {
    display: none;
  }
}
Javascript Code
The final section of code will add functionality, allowing the images to expand at any position in the carousel.
const panels = document.querySelectorAll('.panel')

panels.forEach(panel => {
    panel.addEventListener('click', () => {
        removeActiveClasses()
        panel.classList.add('active')
    })
})

function removeActiveClasses() {
    panels.forEach(panel => {
        panel.classList.remove('active')
    })
}
Tags: CSS, js, javascript, image gallery, css image galley, expanding images, image carousel,